
During the move we made earlier this year, the movers in their infinite wisdom placed a bed rail leaning almost vertical against the wall. It was no longer nearly vertical when the second mover brushed up against it and sent it crashing through our coffee table's glass table top. And so the pictures begin...


I had an 8/4 board of white ash which I used as leg stock for shaker tables. I ripped 4 legs out, crosscut the 4 aprons for the table, and then ripped them to the correct length. And I did this all by hand. Sigh.
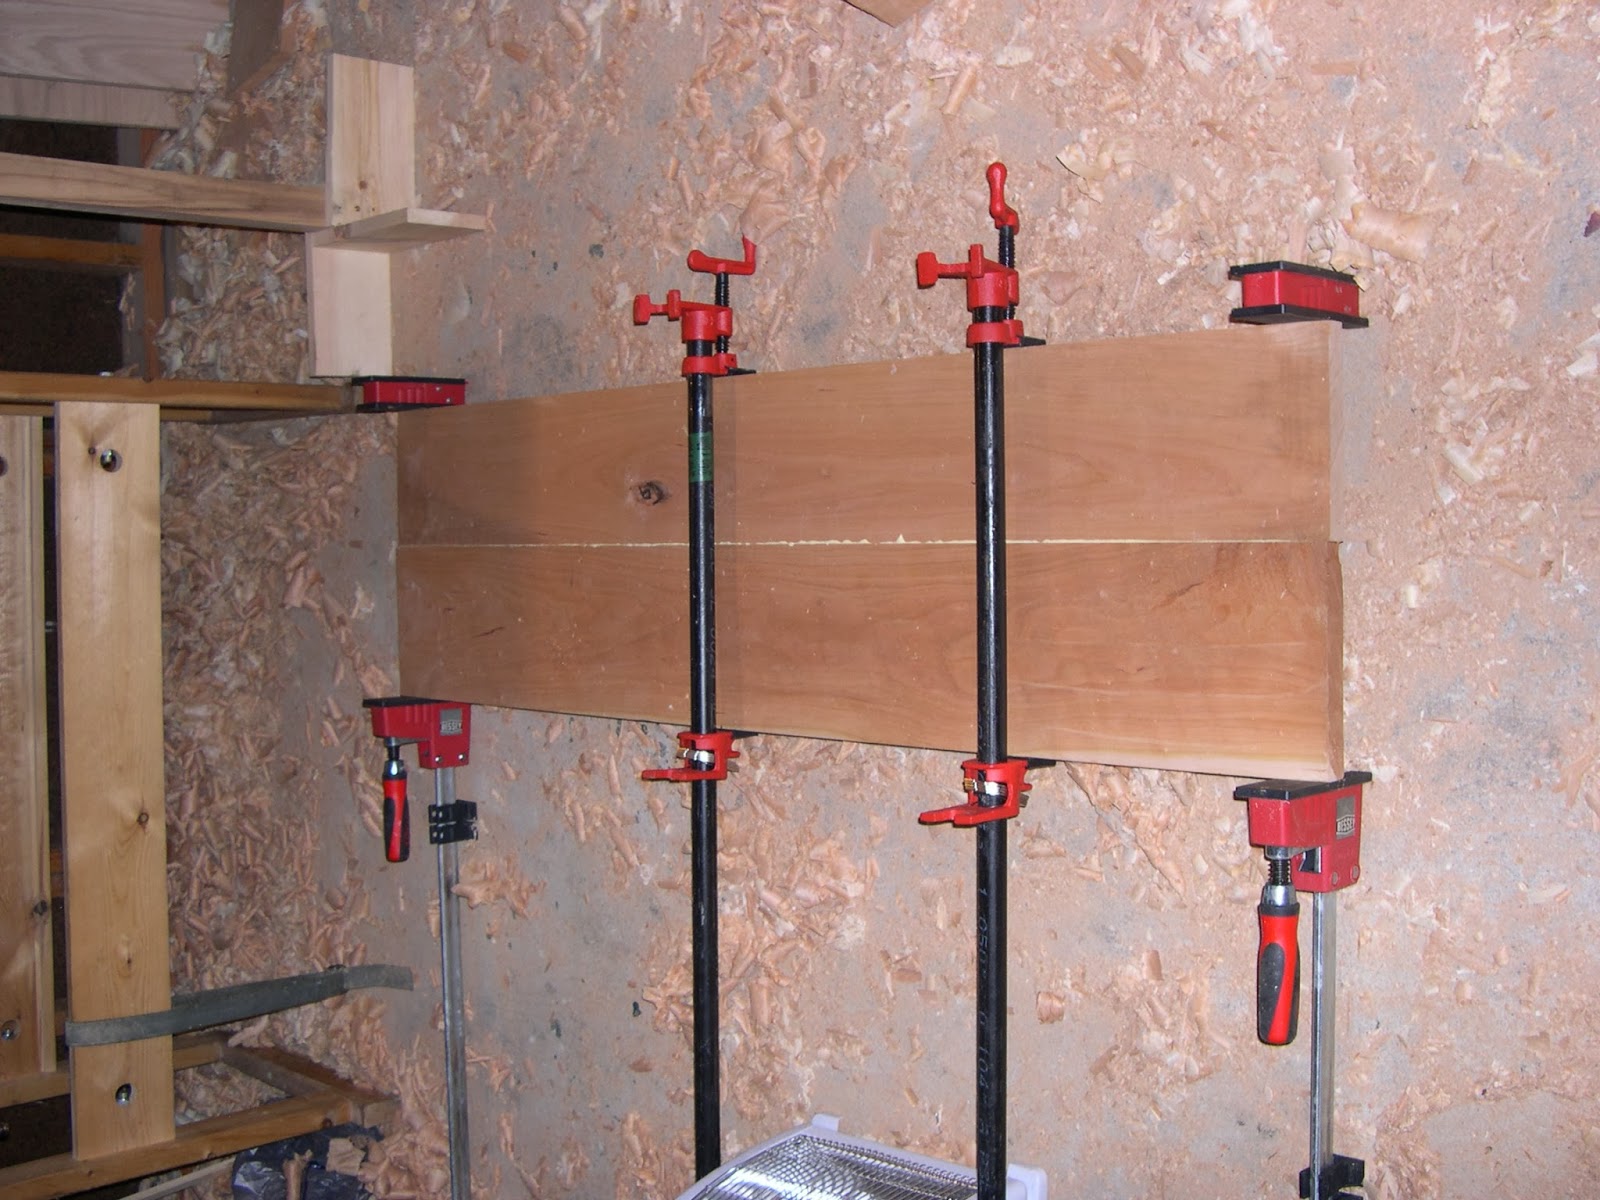
Right now the top is still in halves, because the entire table top is 25 inches wide and my ugly duckling of a bench is only 18 inches wide. The picture above shows one half of the top. I'm planning on flattening the two halves separately, and then carefully glue their edges together to get the entire top. And then probably smooth it on my shop floor or something like that.
I used titebond to for gluing up, but I noticed that it had frozen overnight. Slightly concerned, I thawed it and used it on the top anyway.
Bad idea. I was able to break the joint easily by hand. I reverted back to using hide glue, because the cold doesn't seem to affect it quite the same way.
After re-gluing the top with hot hide glue, I flattened it with a jack plane and then a jointer plane. There was a little bit of sapwood on one edge of the top. I was fine with it because it acted as a slight accent to the long edge of the top (it'd be a completely different story if the sapwood was in the center of the top). However, it was also a live edge at one point that had its bark removed, and was at a 45 degree angle that made it very difficult to get good clamping pressure on it with bar clamps. So I ripped it off.
After that I glued up the two halves with hot hide glue again and then coarsely flattened the bottom to work on the top.
It seems I never fully learn whenever I do this, but I think it's just best to leave stock oversized, glue everything up, and then flatten it. I flattened this panel about 6 times or so instead of just once. Maybe when I get around to building the sideboard...


As I found out the hard way, it doesn't really matter to what extent you finish the vertical edges. For the base of the coffee table, I wiped on about three coats of wiping varnish and let it cure for about a day until the varnish smell dissipated. I had it sitting out in the sunlight to give it a little bit of color, but since it's going in a living room area, it'd develop a darker cherry color over the years.
For the top I wanted to use French polishing with garnet shellac just to see how easily cherry takes a finish and what the look would be. The bodying session was done in about an hour and a half. The next morning the finish had sunk back into the pores a hair, so I filled them back up with shellac again and then began clearing the top of oil and smoothing out the final finish.


I had an 8/4 board of white ash which I used as leg stock for shaker tables. I ripped 4 legs out, crosscut the 4 aprons for the table, and then ripped them to the correct length. And I did this all by hand. Sigh.
Right now the top is still in halves, because the entire table top is 25 inches wide and my ugly duckling of a bench is only 18 inches wide. The picture above shows one half of the top. I'm planning on flattening the two halves separately, and then carefully glue their edges together to get the entire top. And then probably smooth it on my shop floor or something like that.
I used titebond to for gluing up, but I noticed that it had frozen overnight. Slightly concerned, I thawed it and used it on the top anyway.
Bad idea. I was able to break the joint easily by hand. I reverted back to using hide glue, because the cold doesn't seem to affect it quite the same way.
After re-gluing the top with hot hide glue, I flattened it with a jack plane and then a jointer plane. There was a little bit of sapwood on one edge of the top. I was fine with it because it acted as a slight accent to the long edge of the top (it'd be a completely different story if the sapwood was in the center of the top). However, it was also a live edge at one point that had its bark removed, and was at a 45 degree angle that made it very difficult to get good clamping pressure on it with bar clamps. So I ripped it off.
After that I glued up the two halves with hot hide glue again and then coarsely flattened the bottom to work on the top.
It seems I never fully learn whenever I do this, but I think it's just best to leave stock oversized, glue everything up, and then flatten it. I flattened this panel about 6 times or so instead of just once. Maybe when I get around to building the sideboard...


As I found out the hard way, it doesn't really matter to what extent you finish the vertical edges. For the base of the coffee table, I wiped on about three coats of wiping varnish and let it cure for about a day until the varnish smell dissipated. I had it sitting out in the sunlight to give it a little bit of color, but since it's going in a living room area, it'd develop a darker cherry color over the years.
For the top I wanted to use French polishing with garnet shellac just to see how easily cherry takes a finish and what the look would be. The bodying session was done in about an hour and a half. The next morning the finish had sunk back into the pores a hair, so I filled them back up with shellac again and then began clearing the top of oil and smoothing out the final finish.


It's not exactly my best work for finishing, but I think it's a good start.
What I learned:- Cherry is somewhat brittle. I'm not sure if this is true of all fruitwoods, but I couldn't help but notice the boards I'd selected for the long edges of the top had somehow chipped quite a bit. I didn't want the top to be flush with the base, and I was pretty close to being there with the overall width, so I let the chips stay. I'm not sure planing them out would have done really anything, though. Sure it would have gotten rid of them, but then my dog would probably knock the table over starting the process again.
- Frozen PVA glue is useless. If it's frozen, toss it. If your shop is unheated and not insulated, like mine, you're better off taking your glue inside or sticking with hide glue.
- Garnet shellac may be better suited for woods that are a little bit darker than cherry. It may be just my eye, but I'm wondering if buttonlac would have been a better choice than garnet. I'm using the Brooklyn Tool and Craft garnet shellac and it just looks very orange. I may have to stain the cherry or tint the shellac for the sideboard.
- White ash is extremely tough. I chopped out the mortises using a 1/4" Narex mortising chisel and it was a beast to get down to 3/4" depth.
- Using jojoba oil for French polishing isn't a great idea. This time around, it was a real bear to get it all off in the clearing session of French polishing. I think I'll stick with olive oil or mineral oil instead.
- Heat your boards up if you're using hot hide glue. I'm using 215 gram strength hide glue from Lee Valley, and I work fast in using it. But as you can see in the pictures, there's a definite glue seem that's there. When I did a dry fit, it was a nice and tight joint, but I think when I started gluing, the glue began gelling too quickly to squeeze out and acted as a spacer for the panels. When I saw it, I was concerned, so I grabbed two long edges and began twisting and pulling, but I wasn't able to break it apart. It's not noticeable in natural light, but the camera's flash was able to reflect it very well.

No comments:
Post a Comment