Sunday, January 26, 2014

Sideboard dry fit


Yesterday I cut the mortise and tenons in the front rails for the drawer runners, in addition to the drawer dividers, and today I cut the mortises in the sideboard back and the tenons on the back end of the drawer runners. I made a mistake in marking the right drawer runner; I had the piece inadvertently turned over when I marked it, so there's a gap between the inside leg and the drawer runner. The problem with this is that although it's not wide enough for a drawer to slip through, there's no room for a drawer guide. I'll fix it with a piece of scrap and hot hide glue, or just use a wide piece glued directly to the case side instead of the runner.

Wrangling this thing into place was a real chore. It's not heavy, but it's long, it's rather tall, and fairly deep. And this is complicated by the fact the drawer runners have to be set into their mortises in the bottom front rail and the case back, all while trying to keep the drawer dividers up tight against the top and bottom rail, and then squeezing everything into the case sides. Sheesh.
Right before cutting the joinery for the drawer runners, I had a brief thought about making the mortises in the back the same width as the runners. That way, I could put the front and back together, and then just slide the runners through the mortise in the back, and then seat the front tenons into the mortises in the front rail.

I (perhaps wisely) chickened out from doing this. The only way that could work is if I glued the front tenons and left the back of the drawer runners unglued. But this would mean that there would only be the glue holding the tenon in place, and that every time you pushed the drawers back, you would cause the runners to slightly pull on the tenons. I'm not sure if this would cause the glue to fail in 5 or 50 years, but there's also the fact that a mortise that big in the back (about 1" across and between 2 to 4 inches wide with a 1 inch depth) could potentially cause the back to split off along the mortises, especially if the drawers are loaded down with china and silverware.
So I wisely, if not adventurously, went with 3/8" mortises and side by side double tenons for the two wider drawer runners.

Dry fitting was done by putting the case back into the two sides, sliding the drawer runners into the mortises in the back, and then gently pushing the sides out so I could get enough clearance to slide the top and bottom front rails into the sides. And then a lot of finagling went on trying to get everything nice and flush. As much as I hate to say, I just don't think using hide glue for this glue up is going to be feasible. Even with my heater on full blast, the shop never got warmer than 37 degrees, and temperatures are supposed to be continuing in the lower 30's this week. Plus, there's no way I'll get everything together in time before the 260 gram hide glue sets. I guess I'll use good ol' yellow PVA.

After I get this thing glued up, I'll probably move it into the house (if possible) to give me space to work on flattening the top. Once the top is in order, I'll fit it to the case and then start work on the drawers. After the drawers are fitted, I can then start on the most exciting part: staining and finishing. I ordered a packet of red aniline dye stain from Lee Valley and I have plenty of scraps to test stains on. I'll see what it looks like with different strengths of the stain (two applications, one application, one application and then wiped) underneath two or three coats of 2 pound cut garnet shellac.

Friday, January 24, 2014

Sideboard Coming Together

The sideboard's coming together. It's exciting because this is the biggest case piece I've ever worked on. It's also a bit of a one-shot deal. I've made three different shaker tables with slightly altered proportions, but that's okay. There's plenty of room for them in the home. I can design newer sideboards to get a feel for what I like, but actually building them isn't the best idea. Where the heck would I put it?!


This thing is huge. It's about 20 inches or so in depth and around 5 feet in length. I'm weighing the pros and cons of these dimensions. Serving on the top of the sideboard will be easy because of the length and depth. But having wide, deep drawers will make it harder to get stuff that's at the very back of it. I guess we'll be limited to storing large tablecloths and the like in it. I do like the height (38 inches). It's right at elbow level for me, and though I'd never consciously think of it, it's nice to pick dishes and the like up without bending slightly.
My dad made a smaller sideboard about 20 years ago that's scaled down to about a 4 foot length with an 18 inch depth. I'm still wondering if that would have been a better choice.
The only thing left to do know is to tease the joints together for the front rails. There's a slight gap on the left hand side of the front rail, so today I'll determine if there's junk in the mortise preventing the tenon from fully seating or if the mortise isn't deep enough. After that I'll start work on the joinery for the drawer dividers and the web frames so the drawers don't fall through empty space.

In between that, I picked up some aniline dye from Lee Valley and I'll be testing it out on different scraps of cherry with garnet shellac to see if I can't get a color I love.


Saturday, January 18, 2014

The New Mutt Workbench

I'm finally getting around to posting the pictures, but I completed my workbench towards the end of December 2013. In the beginning of 2012 I purchased a Sjoberg hobby workbench since it was on sale at Woodcraft and it lasted for about 2 years or so. But it was a total piece of junk. The top was laminated maple that was barely over an inch thick, the legs were fir that were fastened with cabinet-type Robertson screws, and the rails were fastened to the legs with nuts and bolts. After about a year, the top warped horribly to the point where flattening boards was akin to playing the lottery (chances of getting the board flat are 1 in 650,000) and because of how thin it was, I was seriously concerned that if I completely flattened it, I would have a half inch thick top that would crack and split during mortising. The Robertson screws became bent and eventually stripped the threads to the point where you could lean on the bench and it would sway. And the rails? Since they were connected to the legs with butt joinery, I had to crank down on the nuts and bolts to prevent them from rotating like a prayer wheel whenever I worked.

Even though this all happened within a year, it was obvious I needed a new workbench within the first few months. Fed up with the thin top, lack of workholding capability, and the short length, I began looking for replacements to purchase. The only problem I had with the benches I found is that the tops were too thin (1 3/4" thick) for mortising by hand, they were way too high (36"), and their legs looked like they were made with eastern white pine from the home center. The others were just too damn expensive (ranging from $2000 to $4000).

It took me another year before I finally got around to building it, but I'm already happy with the results. In another year or two I'll update this post with changes I'd like to make to it.


The trestle base is made up of 3x3 leg blanks for the bottom and top, and the legs are 2x2 red oak. The top portion is through mortised, wedged, and drawbored. The rails are southern yellow pine half-lapped and bolted to the legs. The bottom is mortised about a third of the way through and is also drawbored. The shelf was made by simply cutting up a 2x10 and screwing it to the bottom of the rails.
The top is southern yellow pine laminated face to face. This was far cheaper than purchasing so called "workbench tops" (I suspect they're countertop production overruns) from Woodcraft and other specialty stores for close to $200. Those things are pretty thin (1 1/2") and more expensive than countertops sold by Ikea. You could certainly purchase two countertops from Ikea, but all told it'll cost close to $400 for shipping and the weight surcharge. The boards I purchased cost close to $75 and I still had material left over.


The vise I installed is a quick release Jorgensen. I still haven't gotten around to building a chop for it. For the tail vise, I ordered a face vise hardware from Lee Valley and will eventually get around to installing it along with constructing the chops. For the time being, I'm making do with holdfasts and a Veritas wonder pup.

Lessons learned:

  • I used a 700mm E.C. Emmerich frame saw with a 9 tpi web. Cutting tenons and the half-laps was a breeze. 
  • Mortising was horrible. After completing most of the mortises with a 3/4" bit and 8inch brace and cleaning up with a mortising chisel, I'm convinced the right tools for this job are a 1" bit and a 12 or 14 inch brace. There's no need to go out and purchase Jennings auger bits; 1" auger bits with hexagonal shanks are available at Lowe's for about 1/4 the price of the NOS bits. 
  • The shelf is extremely handy. Right now I'm using it for pieces of the sideboard that I'm building. It adds weight to the bench, it keeps things close at hand, and the weight of all the pieces stacked on top of each other keeps them flat.
  • I think the Jorgensen vise is better suited as a tail vise. The quick release feature doesn't offer any appreciable advantage over conventional face vises.
  • If I had the time, I would have constructed the rails with through joinery and then bolted them to the legs. However, I can't get the bench to rack at all, and it only took about two hours of doing the joinery by hand and massaging all the joints to where they fit perfectly. Deep mortising is a completely different beast. I spent hours fiddling around with the walls trying to find out where it was humped in its 3" depth, carefully paring, and then testing the fit. Absolute misery.
  • The overall bench is a little bit short (69"), but it fits my shop. If I had to, I could build a new top, and make new rails using the same base and stretch it out to 7 feet or whatever would fit.

Wednesday, December 4, 2013

Coffee table in cherry and ash

During the move we made earlier this year, the movers in their infinite wisdom placed a bed rail leaning almost vertical against the wall. It was no longer nearly vertical when the second mover brushed up against it and sent it crashing through our coffee table's glass table top. And so the pictures begin...


I had an 8/4 board of white ash which I used as leg stock for shaker tables. I ripped 4 legs out, crosscut the 4 aprons for the table, and then ripped them to the correct length. And I did this all by hand. Sigh.
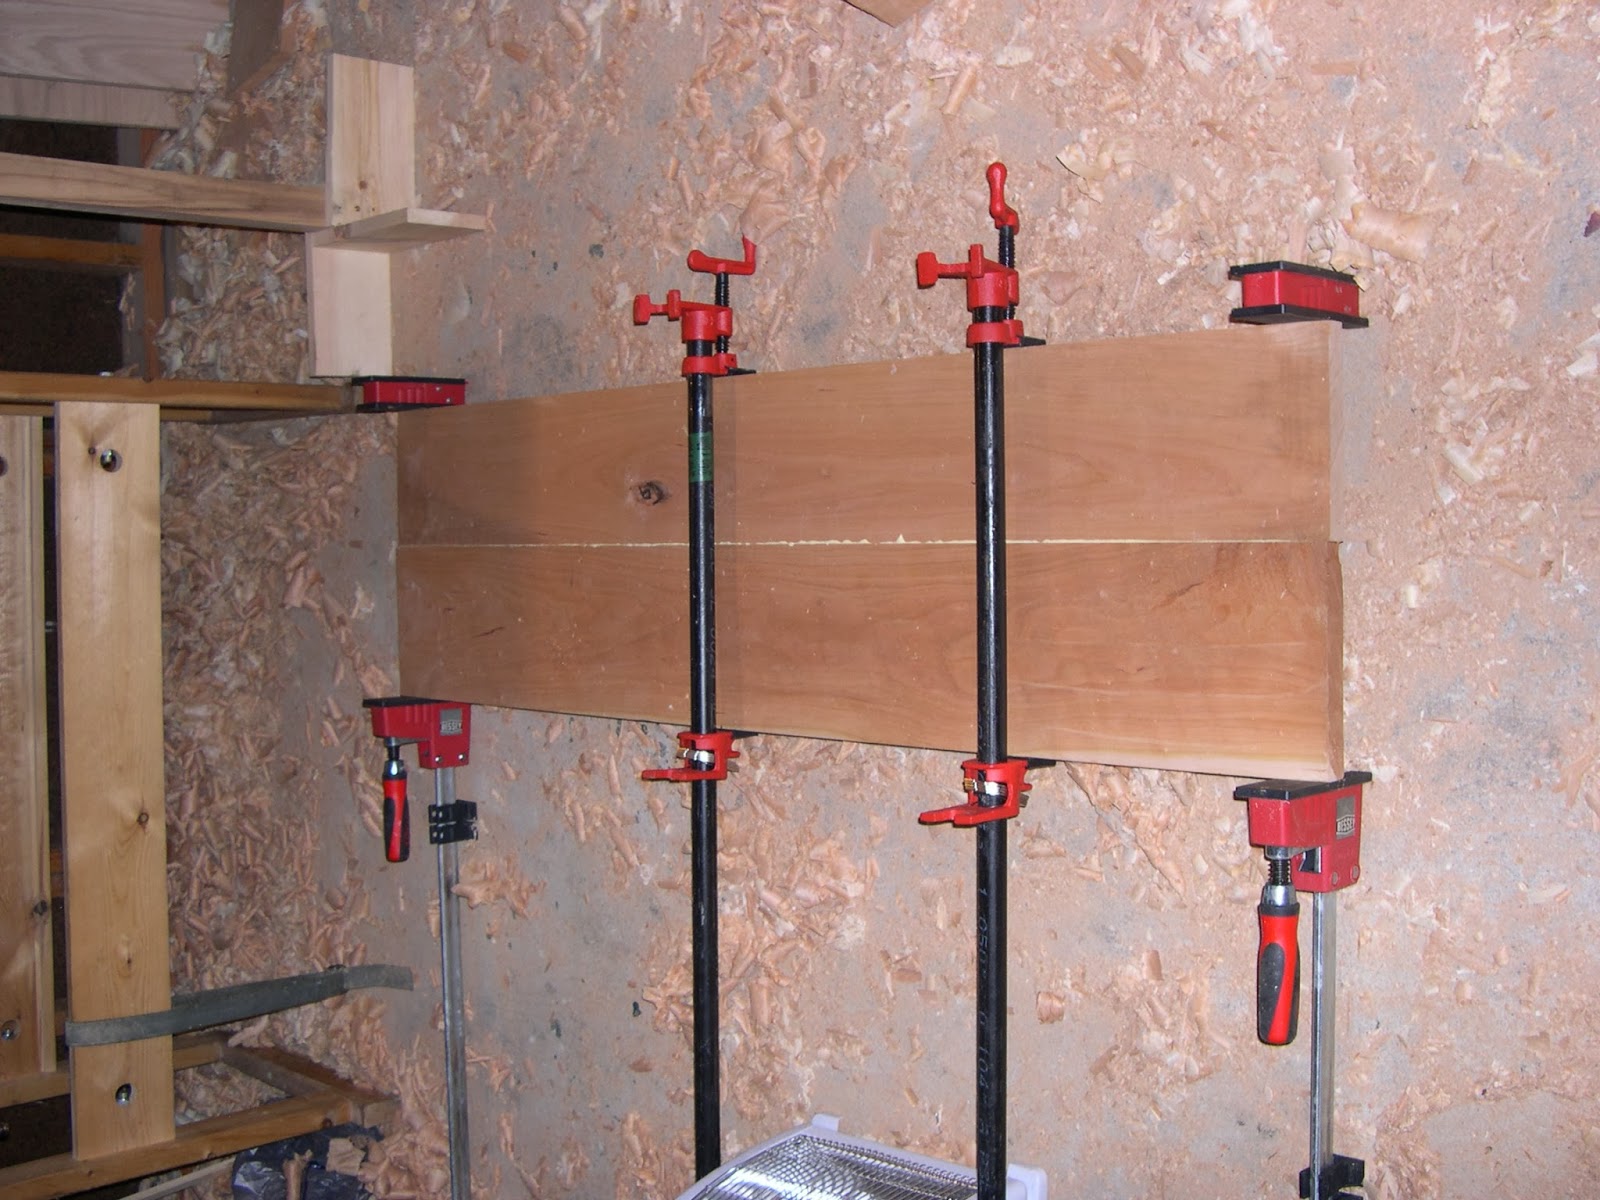
Right now the top is still in halves, because the entire table top is 25 inches wide and my ugly duckling of a bench is only 18 inches wide. The picture above shows one half of the top. I'm planning on flattening the two halves separately, and then carefully glue their edges together to get the entire top. And then probably smooth it on my shop floor or something like that.
I used titebond to for gluing up, but I noticed that it had frozen overnight. Slightly concerned, I thawed it and used it on the top anyway.
Bad idea. I was able to break the joint easily by hand. I reverted back to using hide glue, because the cold doesn't seem to affect it quite the same way.
After re-gluing the top with hot hide glue, I flattened it with a jack plane and then a jointer plane. There was a little bit of sapwood on one edge of the top. I was fine with it because it acted as a slight accent to the long edge of the top (it'd be a completely different story if the sapwood was in the center of the top). However, it was also a live edge at one point that had its bark removed, and was at a 45 degree angle that made it very difficult to get good clamping pressure on it with bar clamps. So I ripped it off.
After that I glued up the two halves with hot hide glue again and then coarsely flattened the bottom to work on the top.
It seems I never fully learn whenever I do this, but I think it's just best to leave stock oversized, glue everything up, and then flatten it. I flattened this panel about 6 times or so instead of just once. Maybe when I get around to building the sideboard...


As I found out the hard way, it doesn't really matter to what extent you finish the vertical edges. For the base of the coffee table, I wiped on about three coats of wiping varnish and let it cure for about a day until the varnish smell dissipated. I had it sitting out in the sunlight to give it a little bit of color, but since it's going in a living room area, it'd develop a darker cherry color over the years.
For the top I wanted to use French polishing with garnet shellac just to see how easily cherry takes a finish and what the look would be. The bodying session was done in about an hour and a half. The next morning the finish had sunk back into the pores a hair, so I filled them back up with shellac again and then began clearing the top of oil and smoothing out the final finish.


It's not exactly my best work for finishing, but I think it's a good start.
What I learned:

  1. Cherry is somewhat brittle. I'm not sure if this is true of all fruitwoods, but I couldn't help but notice the boards I'd selected for the long edges of the top had somehow chipped quite a bit. I didn't want the top to be flush with the base, and I was pretty close to being there with the overall width, so I let the chips stay. I'm not sure planing them out would have done really anything, though. Sure it would have gotten rid of them, but then my dog would probably knock the table over starting the process again.
  2. Frozen PVA glue is useless. If it's frozen, toss it. If your shop is unheated and not insulated, like mine, you're better off taking your glue inside or sticking with hide glue.
  3. Garnet shellac may be better suited for woods that are a little bit darker than cherry. It may be just my eye, but I'm wondering if buttonlac would have been a better choice than garnet. I'm using the Brooklyn Tool and Craft garnet shellac and it just looks very orange. I may have to stain the cherry or tint the shellac for the sideboard.
  4. White ash is extremely tough. I chopped out the mortises using a 1/4" Narex mortising chisel and it was a beast to get down to 3/4" depth.
  5. Using jojoba oil for French polishing isn't a great idea. This time around, it was a real bear to get it all off in the clearing session of French polishing. I think I'll stick with olive oil or mineral oil instead.
  6. Heat your boards up if you're using hot hide glue. I'm using 215 gram strength hide glue from Lee Valley, and I work fast in using it. But as you can see in the pictures, there's a definite glue seem that's there. When I did a dry fit, it was a nice and tight joint, but I think when I started gluing, the glue began gelling too quickly to squeeze out and acted as a spacer for the panels. When I saw it, I was concerned, so I grabbed two long edges and began twisting and pulling, but I wasn't able to break it apart. It's not noticeable in natural light, but the camera's flash was able to reflect it very well.

Friday, August 30, 2013

Milton Friedman in Practice

A recent article on cnbc.com describes alternative ways to pay for college. But the one method that garnered my attention was an individual who used crowdsourcing to generate enough money to pay university tuition. The reason why it was interesting to me is because Milton Friedman, in Free to Choose, actually conjectured that this would be a feasible solution for paying your way through college without loans. His argument was that outside investors would contribute capital with the expectation that you would repay them a certain percentage of your salary for a fixed term. It was (ideally) a win-win situation in that you didn't have to defer purchasing a home or new car due to student loans, and the investors, if they used proper vetting, would have a reasonable rate of return.
I just thought it was really neat to see it in action, though I'm curious as to if this will result in a drop in humanities.

Wednesday, August 14, 2013

Chris Schwarz's Traveling Tool Chest

In the meantime since my last post, I've assembled the tool chest case, installed the top and bottom skirts, and completed the tool tray. The main reason for having the skirts is the way the chest's case is constructed; dovetails can only go together in one direction, and by default, can go apart the same way. By alternating the way the dovetails go on the skirts with the dovetails on the case, it effectively traps the chest case so the sides can't bow out and fail.
Although I'm pretty sure Chris Schwarz looked at several antique examples of tool chests to come up with his design, the most puzzling thing about the chest was the bottom skirt. When I was first reviewing the sketchup model for the chest, a cursory glance at the bottom skirt made me think that it was similar to other bases I'd seen for case pieces with rabbets on the inside and the chest would slide down and be glued and possibly nailed to the bottom. Moldings would follow to cover up the transition from case to skirt. 
Not exactly. The bottom skirt slips down around and lies flush with the bottom battens, but it's simply glued to the case sides. Hmph.
Although I've been able to get away without measuring through the use of dividers, story sticks and what not, pinch rods would've been extremely helpful for getting a tighter fit on the skirts. They're just two pieces of wood with a fastener in the middle to hold them together, allowing you to measure inside cases with them and then transcribe to a piece of wood for cutting. I can't recall how many times I've used a ruler or tape measure only to have a parallax error rear its quarter inch long head on the piece I've cut.
For the bottom skirt, I measured carefully, cut the dovetails carefully, screwed up an entire set of the pins carefully, and then carefully swore as I attempted to wrangle glue and bar clamps on the skirt while manipulating it into place.
For all the difficulty, the only gap on the bottom skirt measures a hair less than 1/32". That's nothing. The wood will probably shift more than that over the changing seasons.
I glued the top skirt flush with the top of the case and omitted the back board of the skirt to allow the lid to pivot down.
I used Tavern Green milk paint on the chest since it's what was on hand, and applied two coats on the front and sides, and a thin wash coat on the back. I thought it looked fine, just a little plain, so I stenciled a scrolling vine sort of pattern on the front and then painted it with acrylic paint and soft camel hair brushes. I think a stiffer brush is in order. The camel hair brushes might be more suitable for water colors on parchment instead of wood. I had a lot of trouble getting crisp lines with the liner brush. It acted more like a mop in that it would refuse to release the paint until I'd press down about halfway to the ferule. Of course, this splayed out the brush hairs and made the line a lot thicker than what I wanted or needed. If I had to do this again, I'd cut out stencils from cardboard or thick paper and tack them down just to get clearly defined borders and lines. Once the acrylic was dry, I applied two coats of butcher block oil (which is really just a thinned varnish) to darken the milk paint and give it a slight sheen.
The only things left are to make, fit, and install the lid, install handles on the side, and possibly make another tool tray.


Stenciled

Painted

Painted and varnished

close up

Sunday, August 4, 2013

Call Me Queequeg

I finally finished cutting out the pin boards and tail boards for the tool chest. Because my workbench is a dinky little affair, clamping up anything in my vise over 5 inches wide is just asking for trouble.
I love trouble. I was thinking about getting my middle named changed to Trouble, but the amount of paperwork that was required was too much trouble. Oh, sweet irony!
Frank Klausz wrote an article in Popular Woodworking magazine about the joys of continental frame saws aka bow saws. He stated that for any material thicker than 1/2" he uses a bow saw. Because my tool chest is a bastard child of red oak, eastern white pine, and hard white ash, I knew that using an ordinary dovetail saw would try my patience. About two strokes of the saw for the hard woods, and one stroke for the pine, was all I needed to get down to my baseline. I used a coping saw to clean out the waste and a chisel to clean up.
I was blown away by how fast it was.
Yesterday I assembled the case and today I'll cut plywood and nail on the bottom including the battens, or rot strips, that span the bottom's width.
When the boards weren't assembled, I could easily stack them up leaning against the wall.
But as soon as the dovetails were cut and the fit perfect and square, I assembled the case to lessen the likelihood of the boards warping or doing other sorts of crazy things. Because of limited space, I had to put them in the study right behind the computer. Every time I glance over my shoulder I see this massive wooden box that always makes me thing of Queequeg and his coffin. Like the novel, I'm sure this coffin will turn out to be a lifesaver for my tools and space.
 
Creative Commons License
This work is licensed under a Creative Commons Attribution 3.0 Unported License.